DSC00509 (Edit)

Lake Toya, Japan

Spot of Tranquility.

IMG_8185 (Edit) (2)

Little India, Singapore

Spices, gold and splashes of colour!

IMG_7713 (Edit) 2

Singapore Flyer, Gardens by the Bay

Garden City, City in a Garden.

IMG_6839 (Edit) (3)

Bryce Canyon, USA

Thor's Hammer

IMG_5531 (Edit) (2)

Chocolate Test, Singapore

"All you need is love. But a little chocolate now and then doesn't hurt." -Charles M Schulz

Showing posts with label Recipes. Show all posts

Friday, December 28, 2018

Garlic bread

I love garlic bread. In fact, sometimes I order soup and get excited waiting for the bread.

I have tried plenty of bad / average garlic bread and a few good ones. The worst garlic breads are definitely those that use garlic spread. I am guilty of buying a bottle of garlic spread and that was a bad mistake- threw it away and resolved never to buy another bottle of garlic spread.

I recently tried a recipe from Ina Garten of Food Network and it's definitely a keeper.

Credit: Food Network
Ingredients 

- 6 large garlic cloves, chopped
- 1/4 cup chopped flat-leaf parsley
- 1/4 cup chopped fresh oregano leaves
- 1/2 teaspoon kosher salt
- Freshly ground black pepper
- 1/2 cup good olive oil
- 1 loaf ciabatta bread
- 2 tablespoons unsalted butter

Directions 

1. Preheat the oven to 350 Degrees F.

2. Place the garlic in the bowl of a food processor and process until minced. Add the parsley, oregano, salt and pepper and pulse twice.

3. Heat the olive oil in a medium saute pan and add the garlic mixture. Remove the pan from the heat.

4. Slice the ciabatta bread in half horizontally, and spread the butter on 1 half. Spread the garlic mixture on the other half of the bread, and put the halves together. Wrap the bread in aluminium foil.

5. Place the bread in the oven and bake for 5 minutes. Open the foil and continue baking for an additional 5 minutes.

Comments about Recipe 
- I did not add fresh oregano leaves as the supermarket didn't sell them. It still worked well though.
- 1/2 cup olive oil seems a tad too much and you may want to reduce it slightly.
- I replaced the ciabatta bread with French baguette because the bakery didn't sell ciabatta.
- Instead of using a food processor, I used manual labour (i.e. hand and arm strength) to mince the ingredients. 

Tuesday, May 29, 2018

Pancake

I'm a sucker for pancakes and waffles but the pancakes sold commercially are always ridiculously expensive (and I end up eating McDonald's pancakes). Since today is a public holiday, I decided to try a recipe from All Recipes. This recipe is for keeps because the pancake is fluffy and moist.

I also give credit to my mini happy call pan (which came together with my Isetan 福袋) as it gives the pancakes their (nearly) round shape.


Adapted from All Recipes 

Ingredients 

3/4 cup milk
2 tablespoons white vinegar (or apple cider vinegar) 
1 cup all-purpose flour
2 tablespoons brown sugar 
1 teaspoon baking power 
1/2 teaspoon baking soda
1/2 teaspoon salt
1 egg
2 tablespoons butter, melted
Cooking spray (optional) 

Directions

1. Combine milk with vinegar in a large bowl and set aside for 5 minutes.

2. Combine flour, sugar, baking powder, baking soda and salt in a medium mixing bowl. 

3. Whisk egg and butter into milk mixture. 

4. Pour flour mixture into the wet ingredients and whisk until the lumps are gone. 

5. Heat a skillet over medium heat. Coat the skillet with cooking spray (I did not do so since the skillet was non-stick). 

5. Pour around 1 ladle worth of batter onto the skillet and cook until bubbles appear on the surface. Flip with a spatula and cook until browned on the other side. 

Serving size
Makes around 8 pancakes 

Sunday, March 19, 2017

Osmanthus Jelly

We had a gathering where we wanted to prepare some food. Taking into consideration the target audience in mind, which consisted mostly of people above 60 years old, with a number of young adults with their kids, we wanted to prepare something that was delicious, healthy and presentable.

After some googling, we decided on osmanthus jelly. The osmanthus jelly they sell in restaurants are exorbitant, once you know the cost of making this jelly.

The first task was to hunt down some osmanthus. Osmanthus is supposed to improve complexion and rich in antioxidants. We bought a bottle of osmanthus from Hockhua Tonic for $7 (60g).


The fragrance of the osmanthus hit us the moment we opened the bottle- it is a very delicate, sweet and subtle fragrance.


The reason why I used a glass tray instead of a konnyaku plastic tray was because people were worried that the plastic tray will melt. That said, we still managed to cut the jelly into pretty diamond shapes- just that it will wobble around when you plate it. 

Receipt modified from Noobcook and Misstamchiak:

Ingredients

1 packet of konnyaku jelly powder 
500 ml water (use the amount stated on the box)
2 tsp dried osmanthus flowers
2 tsp wolfberries soaked in water until puffy and drained 
Chia seeds soaked in water and drained 

Directions 

1. In a pot, add water and bring to boil. Lower heat and add osmanthus flowers. Simmer for about 2-3 minutes.

2. Add konnyaku jelly powder. Stir until the powder is fully dissolved. Switch off the flame.

3. Pour the mixture into a jelly mould, or in my case a glass tray. Add about 2 to 4 wolfberries to each mould. 

4. Add chia seeds (which will give an added crunch) to the mixture. 

5. Let the jelly cool down in room temperature and chill in fridge until jelly is set. 


The jelly is inexpensive, healthy, presentable and a crowd pleaser. 

Friday, December 30, 2011

Mango Sago Pomelo 杨枝甘露

I love mangoes and always order some form of mango dessert when I'm out, whether in hawker centres or restaurants. The fact that mangoes are healthy is of course secondary. What matters is its taste. So, I decided to make Mango Sago Pomelo 杨枝甘露 based on noobook's recipe. Since Chinese New Year is coming soon, give this a try! I assure you everybody will love it! 

And regarding the pomelo... 


Mango Sago Pomelo 杨枝甘露 (adapted from noobcook
(Serves 6) 


Ingredients
1) 600 ml mango juice (freshly squeezed or ready made)
2) 200 ml evaporated milk
3) 3 large ripe honey mangoes, cubed
4) Sugar syrup by mixing 2 tbsp caster sugar with just enough hot water to dissolve
5) 120 g sago pearls
6) Pomelo, peeled and sacs separated (about 75g or more)

Directions 
1) Boil a pot of water to boil. Add sago and simmer for about 10 minutes.Turn off the stove, cover the pot with lid and let the sago continue to cook on its own for about 10 minutes, until all the sago turns translucent.
Run the cooked sago through a fine sieve and running water to remove excess starch. Set aside.
2) Reserve one quarter of the cubed mangoes for garnishing (step 4). In a blender, blend the rest of the mangoes and the evaporated milk for a short while till well mixed.
3) Mix mango smoothie prepared in step 2 with mango juice. Add sugar syrup to taste. Add cooked pearl sago prepared in step 1 to the mixture. Chill in fridge.
4) To serve, portion out to individual serving bowls and garnish with pomelo sacs and cubed mangoes.

Wednesday, October 26, 2011

Pancakes

The lack of updates is due to impending doom to such a thing called exams.

Nonetheless, here's a recipe on pancakes. I used to buy the mix from boxes, until I realised that it doesn't require much effort to make pancakes. Pancakes can be eaten as breakfast, as brunch, or as dessert. Just remember to down it with plenty of maple syrup!

Nothing speaks of happiness more than the blissful combination of fluffy pancakes and tonnes of maple syrup! (I know the pancakes are ugly. But don't judge- they taste good!)

Recipe from allrecipes.com

Ingredients
  • 1 1/2 cups all-purpose flour
    3 1/2 teaspoons baking powder
    1 teaspoon salt
    1 tablespoon white sugar
    1 1/4 cups milk
    1 egg
    3 tablespoons butter, melted

Directions
1) In a large bowl, sift together the flour, baking powder, salt and sugar.
2) Make a well in the center and pour in the milk, egg and melted butter; mix until smooth.
3) Heat a lightly oiled griddle or frying pan over medium high heat.
4) Pour or scoop the batter onto the griddle, using approximately 1/4 cup for each pancake.
5) Brown on both sides and serve hot.

Sunday, September 18, 2011

Portabello Mushroom Burger

Kids are getting increasily obese in this time and age where every corner you turn, you see a fast food restaurant. Perhaps if you were just a little cautious with your food, you would be astounded by the amount of calories that can be contained in a seemingly-innocuous burger.

But there are some food that can satisfy that junk food craving and yet be equally healthy as well. I know portabello mushrooms don't sound like they can replace your crunchy crispy chicken pieces. But they are gooood. I first tried it with some cynicism at Cheesecake Factory and was hooked ever since. The juiciness of it. Om nom nom.

But the calories for CCF is horrifically high. So why not do it at home, it's something that requires very little work (seriously, when I say very little, I really mean very little).

Ingredients (serving size: 4) (Adapted from allrecipes.com)
1) 4 portabello mushroom caps
2) 1/4 cup balsamic vinegar
3) 2 tablespoons olive oil
4) 1 tsp dried basil
4) 1 tsp dried oregano
5) salt and pepper (a dash)

Directions
1. Pre-heat the oven.
2. Place the mushroom caps, smooth side up in a baking pan.
3. Mix the vinegar, oil, basil, oregano, garlic, salt and pepper in a small bowl.
4. Pour half of the mixture over the mushrooms and put it in oven.
5. Ten minutes later, flip the mushroom and pour the remaining mixture.
6. Toast the bread of the burger with a little butter on it.

Hint for extremely lazy people like me: I tried the above the first time round and it was not bad. But here's a faster tip. Just place some small pieces of butter with some spices and pepper on the mushroom and flip it around in the oven once at 15 minutes and it'll be ready in around 25-30 minutes.

And voila! Juicy mushrooms at your fingertips! (Oh please add the nachos too, just so you don't feel like you've suddenly become vegetarian.)

Wednesday, August 10, 2011

Satay

After the introductory post on satays, I'm going to post a fuss-free post on how to make satays on your own. This was an extremely crazy process trying to cube the meat and skewer it. But guess what, it all pays off in the end and really is not as troublesome as it seems. Plus don't forget, this is the blog for lazy people. That explains the bottle of satay sauce.


Ingredients (Makes about 40 sticks)
6 pieces boneless chicken thigh
1/2 bottle of Yeo's satay sauce
1 minced onion
1 minced garlic
3 tbsp curry powder
1 tbsp lemon juice
5 tbsp soya sauce
1 tbsp sugar

Directions
1) Cube the chicken.
2) Put all the ingredients, including chicken, into a ziploc bag.
3) Mix well and leave it in the fridge for 2 hours
4) Skewer the cubed marinated meat on sticks.
5) Put them in the oven at 350F until the meat is cooked.
6) Serve with cucumber, onions and half bottle of Yeo's satay sauce.


Monday, August 1, 2011

Banana Cake

The thing is, there are cooks, and there are good cooks. And then there are the noob cooks. I, unfortunately, fall into the last category. I don't cook if I have the choice, and when I cook, I cook well enough for myself to stay alive.

That's why I'm constantly on the hunt for recipes that are easy to follow, not complicated and totally idiot proof. And the banana cake recipe is a wonderful recipe that falls into this category. I baked it because I had this penchant to buy bananas, thinking I would eat them somehow someday. But somehow I always end up forgetting about the existence of these bananas. And when they are overriped, filled with lots of black spots, the only logical thing to do is- bake a banana cake.

The cake turned out beautifully, with a crispy banana surface, and a moist texture within the cake. I kept it for a few days and it endured a ride from Boston to Martha's Vineyard. In fact, it actually tasted better as the days went on, with the banana taste becoming more accentuated.

The recipe's from bakingmum, unfortunately she no longer blogs.

Adapted recipe

Ingredients
180 gm. Butter
140 gm. sugar
2 large Eggs - beaten lightly
250 gm. Cake flour
1 tsp. baking powder
1 tsp. Bicarbonate of Soda
2 mashed bananas
50 gm. milk
1 tsp vanilla essence
2 bananas - slice

Directions
(1) Cream butter and sugar till light and creamy.
(2) Pour in eggs gradually and beat till creamy.
(3) Add in whip cream, mashed bananas and banana essence and mix well.
(4) Add in cake flour, baking powder and bicarbonate of soda and beat them together for a while.
(5) Pour into a round tray, and arrange sliced bananas on top.
(6) Bake at 175C for about 50 to 60 mins. or until cooked.

Apple Pie

I baked this for my own birthday last year. Don't mind the photo, I know it looks awful. But at least, if there's any lesson to be learnt from this- don't judge a pie by its skin. It turned out to be a very yummylicious apple pie, despite the ugly terrains on the skin of the apple pie.

I tried using another recipe to bake the apple pie before, and it didn't taste half as good as this. I promise you this is one of the best recipes you are going to see anywhere. I bought this apple pie with me, from Boston to Amherst. It survived a three hour bus ride, complete with all the bumps on the road, and arrived intact.

We brought the apple pie to a restaurant in Amherst and three of us managed to finish half the pie. I could distinctly remember people looking curiously at the apple pie. Since when did the restaurant serve such an apple pie? And then, a couple walked to the counter, pointed at the apple pie, and asked whether they could have that. Sorry folks, apple pie baked with love not available!


the original recipe from allrecipes.

the adapted recipe (For those who are as lazy as me):

Ingredients
two 9 inch deep dish crust pies (available at all supermarkets)
1 stick unsalted butter
3 tablespoons all-purpose flour
1/4 cup water
1 cup white sugar
1 tsp cinnamon
5 Granny Smith apples - peeled, cored and sliced

Directions
1) Preheat oven to 425 degrees F (220 degrees C).
2) Melt the butter in a saucepan. Stir in flour to form a paste. Add water, sugar and bring to a boil. Reduce temperature and let simmer.
3) Add cinnamon to the apples and mix well.
3) Fill one crust pie with apples, mounded slightly.
4) Gently pour the sugar and butter liquid over the crust. Pour slowly so that it does not run off.
5) Invert the other crust pie and put it over the apples and liquid and pleat the sides of both crusts.
6) Bake 15 minutes in the preheated oven.
7) Reduce the temperature to 350 degrees F (175 degrees C). Continue baking for 35 to 45 minutes, until the crust turns golden brown.

Tuesday, July 26, 2011

eggplant parmesan

I have no idea why I decided to make this dish. Probably because I saw a glass baking tray and I figured that I should do something with it. And I decided eggplant parmesan it shall be! ironically, i didn't put parmesan because i realised how incredibly expensive cheeses were. It was $11 for a packet of mozarella cheese, nothing like the price in US!

Adapted from allrecipes.com

Ingredients
2 eggplants, peeled and thinly sliced (around 1/4 inch)
2 eggs, beaten
4 cups Italian seasoned bread crumbs
6 cups spaghetti sauce, divided
1 (16 ounce) package mozzarella cheese, shredded and divided
1/2 cup grated Parmesan cheese, divided
1/2 teaspoon dried basil

Directions
1) Preheat oven to 350 degrees F (175 degrees C).
2) Sweat the eggplant slices by sprinkling with sea salt and let it sit for 30 min
3) Rinse and pat the eggplant slices dry with paper towel
4) Dip slices into beaten eggs and coat in ziploc bag with seasoned bread crumbs.
5) Place on a baking sheet coated with EVOO and bake for 7 min at 450F, flip and bake an addition 5-7 min
6) In a 9x13 inch baking dish spread spaghetti sauce to cover the bottom.
7) Place a layer of eggplant slices in the sauce. Sprinkle with mozzarella and Parmesan cheeses. 8)Repeat with remaining ingredients, ending with the cheeses. Sprinkle basil on top.
9) Bake in preheated oven for 35 minutes, or until golden brown.

Sunday, July 24, 2011

Chocolate Lava Cake

Today, I've finally baked a proper chocolate lava cake. I tried it once before but it turned out to be like chocolate cake. Now, it finally has 'lava' spewing out of it! Anyway, this recipe from noobcook is really good. Not to sweet, not too buttery, just the perfect amount of chocolate goodness.

By the way, just a little tip on the ramekin cups. You can get those at $2 each at Daiso. Be sure to slowly invert the ramekin, otherwise it will just burst open and the chocolate will come flowing out.

Adapted from noobcook.com:

Ingredients
(makes three 6-oz ramekin cakes)
100g dark chocolate (i used 70% dark chocolate lindt), cut to small cubes
100g unsalted butter, cut to small cubes
2 eggs
50g caster sugar
20g self-raising flour

To decorate (optional)
icing sugar and small sieve
berries
vanilla ice cream

Additional tools
spatula
oven safe ramekins (6-8 oz)

Directions
1. Melt dark chocolate and butter using either the microwave, a hot water bath or a double boiler (note: do not use direct stove heat or the ingredients will burn).
2. In a large bowl, whisk the eggs and sugar till the mixture turns pale and frothy.
3. Pour melted chocolate/butter you prepared in step 1, into the egg mixture prepared in step 2. Stir in the flour. Use a spatula to mix everything evenly.
4. Grease your ramekins with some melted butter (so that the cake will come off cleanly when it is baked). Fill the ramekin almost 3/4 full with the chocolate mixture and bake in a preheated oven of 180C (356F) for about 10 minutes.
5. When it is baked, remove ramekin from oven and let cool for 1-2 minutes. Use a spoon to gently loosen the edges. Carefully invert the cake onto serving plate.
6. Serving suggestion: Use a sieve to dust icing sugar over the cake. Serve a scoop of vanilla ice cream and some berries at the side.

Thursday, June 23, 2011

Pineapple Tarts

I love pineapple tarts, the more butter, the better. Here's an earlier post on pineapple tarts: http://rollingwrites.blogspot.com/2011/06/singapore-pineapple-tarts.html

The thing about eating is that, sometimes ignorance is bliss. The copious amount of butter and sugar added into pineapple tarts is pretty scary. But for good food, some sacrifice is necessary, in the form of additional fats. The first time I did it, I nearly fainted from chopping the pineapple up. I had no grinder, and was using a scissors to randomly hack at the pineapple pieces. But later I found out that there were mashed pineapple in cans- buy that and save your trouble.

Here's a recipe, adapted from rasamalaysia.


Ingredients

For the pastry filling

2 1/2 cups (350g) all-purpose flour
2 sticks butter/8 oz./1 cup/225 grams butter
1/4 teaspoon salt
2 egg yolks
4 tablespoons confectioners’ sugar/icing sugar
2 tablespoons cornstarch (corn flour)
1 egg yolk (lightly beaten for egg wash)

For the pineapple filling

2 cans (20 oz can) sliced pineapples
10 tablespoons sugar (more or less to taste)
1 teaspoon cornstarch or corn flour (mixed with 1 teaspoon water)

Directions

Preheat oven at 350 F.

1) Drain the pineapple slices and then squeeze the extra water/juice with your hands.
2) Blend the canned pineapples until it’s mushy, about 10 seconds. If you don't have a blender, just cut it as fine as possible using a pair of scissors.
3) Using medium heat, cook the pineapple and sugar until most liquid has evaporated, and the filling turned golden. Stir constantly using a wooden spoon to avoid burning. Taste, and add more sugar when needed. Add in the cornstarch (corn flour) to thicken the filling. Let it cool in the fridge.
4) Sieve the flour, cornstarch, salt and sugar into a medium bowl. Soften the butter to room temperature.
5) Add in the egg yolks and the flour. Knead to form the dough.
6) Divide the dough and pineapple filling each into 24 equal rounds.
7) Flatten the pastry dough with the palms and put the pineapple filling in the middle and use the dough to cover the filling.
8) Use your palms to round it up and then shape it into a ball.
9) Brush with egg wash.
10) Bake for 20-25 minutes or until light brown.

Ondeh Ondeh

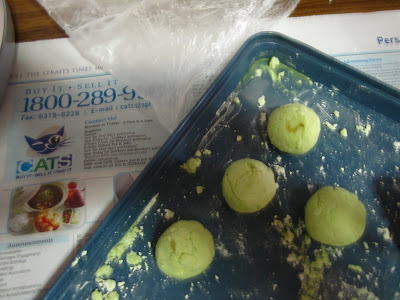
I made some ondeh ondeh one Sunday afternoon when both my mum and I were particularly bored. They took something like 2+ hours to make, probably because I'm noob at trying to stuff the gula melaka into the green dough!

Anyway, this adapted recipe comes from a favourite blog of mine Seasaltwithfood.

Ingredients
250g glutinous rice flour
200 ml of pandan juice (blend 10 pandan leaves with 220 ml water)
150 g gula melaka, finely chopped
100 g grated coconut (1/2 a coconut worth)

Directions
1) Combine glutinous rice flour with pandan juice and knead lightly


2) Pinch a small piece of the dough (about golf ball size) and drop it into boiling water.

3) When the dough rises up to the surface, remove it with a spoon and shake off the excess water.

4) Mix it back into the dough and knead well to form a smooth dough.

5) Cover the dough and set aside for 15 minutes.

6) Mix the grated coconut with a pinch of salt and steam for about 2-3 minutes. Cool completely.

7) Bring a pot of water to boil.

8) Pinch a small piece of dough and flatten slightly and form a cup shape in your hands. Fill the centre with gula melaka. Roll in palm to form a smooth ball and cook the balls in boiling water. (There's actually no need for a rolling pin.)


9)When the balls float up, remove them with a spoon and shake off excess water.

10) Coat the rice balls with grated coconut.

Finally, enjoy that burst of gula melaka in your mouth!